How to connect and program the Geekcreit 0.96 inch 4 pin white I2C OLED module with Arduino. OLED display based on a SSD1306 OLED driver IC.
In this tutorial a 0.96 inch monochrome OLED display from Geekcreit is connected or interfaced to an Arduino. Libraries are then installed and some example programs run which show how to use the display in an Arduino sketch.
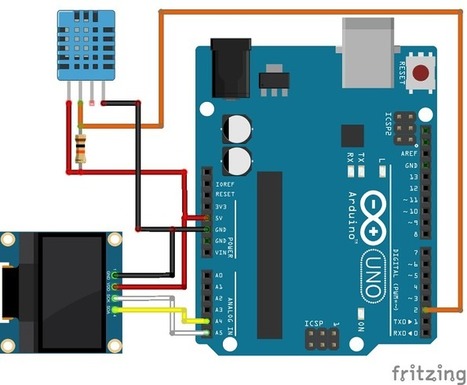
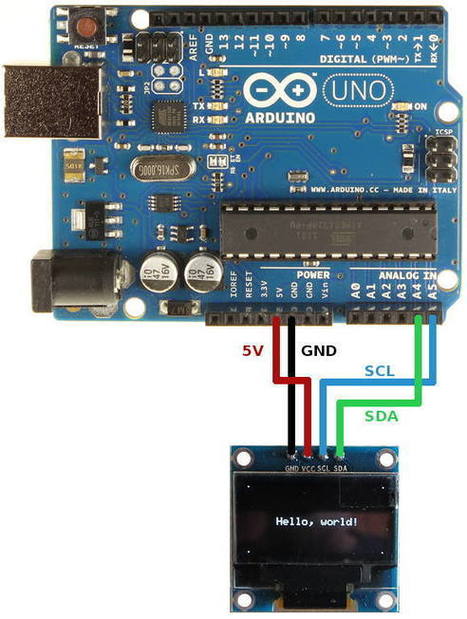
The display connects to Arduino using only four wires – two for power and two for data, making the wiring very simple. The data connection is I2C (I²C, IIC or Inter-Integrated Circuit). This interface is sometimes called TWI (Two Wire Interface).
At the very lowest level, the Arduino Wire library is used to communicate with the display. Libraries are available that make it easy to start using the display right away to display text and graphics. These libraries are installed in this tutorial.
[Gust MEES] It works with THIS OLED <===> https://www.amazon.de/dp/B01L9GC470
Learn more / En savoir plus / Mehr erfahren:
https://www.scoop.it/t/21st-century-learning-and-teaching/?&tag=ARDUINO


 Your new post is loading...


This post is about how to use the 0.96 inch OLED display with the Arduino. It includes schematics and code It is a very small display, the screen has 25mmx14mm...
Learn more / En savoir plus / Mehr erfahren:
https://www.scoop.it/t/21st-century-learning-and-teaching/?&tag=ARDUINO
https://www.scoop.it/t/21st-century-learning-and-teaching/?&tag=OLED