Raspberry Pi
1.1M views | +3 today
Follow
 
Scooped by F. Thunus
onto Raspberry Pi
Scoop.it!

Samsung Joins Arduino Certified Program with ARTIK family

Samsung Joins Arduino Certified Program with ARTIK family | Raspberry Pi | Scoop.it
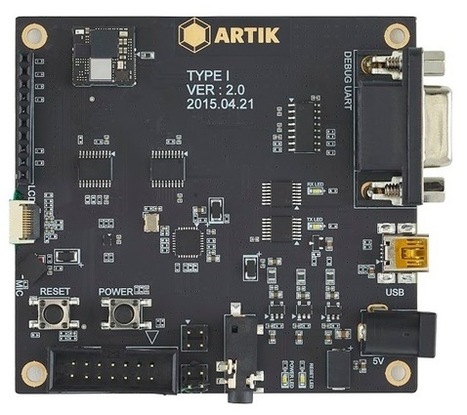
Arduino Blog » Blog Archive » Samsung Joins Arduino Certified Program with ARTIK family: http://t.co/ShezDr5r4c #ITUGent
No comment yet.
Raspberry Pi
A complete ARM GNU/Linux computer for $25.
(also covering Arduino and BeagleBone)
Curated by F. Thunus
Your new post is loading...

Popular Tags

Scooped by F. Thunus
Scoop.it!

Dear reader,

Dear reader, | Raspberry Pi | Scoop.it

The Raspberry Pi project website is http://www.raspberrypi.org/

This is one of my news digests. If you like my editorial choices, there are more to be found by clicking on the "dear reader" link, and on my name above.
Enjoy !

Donald Thomas's curator insight, August 30, 2014 8:07 AM

this is 

Wuzea Recherche's comment, March 15, 2015 6:45 AM
Propose de rechercher une ressource en tapant un mot clé dans le champ de recherche. Wuzea : http://www.wuzea.com
Vasu10's curator insight, June 9, 2021 1:49 AM
Takeoff projects help students complete their academic projects. Register at takeoff projects today to find and learn about different interesting big data projects and grab the best jobs. Get started right now.
Scooped by F. Thunus
Scoop.it!

Open Source Projects Overview: Laptop and Raspberry Pi CM4 Module

**Open Source Projects Overview: Laptop and Raspberry Pi CM4 Module**

In this episode of the Altium OnTrack podcast, host Zach Peterson sits down with Lukas Henkel from Open Visions Technology to explore two groundbreaking open source projects: an open source laptop and an alternative to the Raspberry Pi CM4 module.

Discover the latest advancements in OPEN SOURCE hardware and learn how these innovative projects are pushing the boundaries of DIY computing.


**Connect with Lukas Henkel:**
- LinkedIn: https://www.linkedin.com/in/lukas-henkel-ovt/
- Open Visions: https://www.linkedin.com/company/ov-tech-gmbh/


👉 Exclusive 15 Days Free Altium Designer Access: https://www.altium.com/promotions/altium-academy

💡 Stay Connected:
Don't forget to like, comment, and subscribe for more in-depth tutorials and tips from @AltiumAcademy Share your thoughts and questions in the comments below!

👉 Subscribe for more: https://www.youtube.com/@AltiumAcademy?sub_confirmation=1

Don't forget to follow us on social to stay up-to-date on the latest Altium Academy content.

👉 Follow Altium on TikTok: https://www.tiktok.com/@altiumdesigner
👉 Follow Altium on Twitter: https://twitter.com/altium
👉 Follow Altium on Linkedin: https://www.linkedin.com/company/altium/
👉 Follow Altium on Facebook: https://www.facebook.com/AltiumOfficial/

👉 Ready to try the industry's best-in-class design experience yourself? Download it today and get started! https://www.altium.com/downloads?utm_source=youtube&utm_medium=social&utm_campaign=yt-sponsor&utm_content=altium-academy


The Altium Academy is an online experience created to bring modern education to PCB Designers and Engineers all across the world. Here you can access a vast library of free training and educational content covering everything from basic design to advanced principles and step-by-step walkthroughs. Join industry legends as they share their career knowledge, review real-life design projects, or learn how to leverage one of Altium's leading design tools. No matter your level of experience, the Altium Academy can help you become a better Designer and Engineer!

About Altium LLC
Altium LLC (ASX:ALU), a global software company based in San Diego, California, is accelerating the pace of innovation through electronics. From individual inventors to multinational corporations, more PCB designers and engineers choose Altium software to design and realize electronics-based products.


0:00 Intro
1:12 Open-Source Laptop Updates
3:58 Webcam Design
5:59 Laptop Design Challenges
11:03 Lessons Learned from Laptop Project
13:20 Advice for Taking On This Kind of Project
19:44 Open Source Raspberry Pi Overview
22:17 Open Source Raspberry Pi Demo
32:35 Coral Module
34:25 Continuing the Project
42:23 Wrapping Up


#OpenSourceLaptop #RaspberryPiAlternative #OPENSOURCE
No comment yet.
Scooped by F. Thunus
Scoop.it!

Raspberrypi: How do I connect the PiCamera to the Raspberry Pi 5?

How do I connect the PiCamera to the Raspberry Pi 5?
Hey guys! Hopefully you found a solution that helped you!
The Content is licensed under (https://meta.stackexchange.com/help/licensing) CC BY-SA.
Attention! This video does always use the same license as the source!
Thanks to all the great people for their contributions!

(raspberrypi.stackexchange.com/users/160259/timst)Timst
(raspberrypi.stackexchange.com/users/70731/codermike)CoderMike
A special thanks goes out to the awesome (raspberrypi.stackexchange.com/questions/145852/how-do-i-connect-the-picamera-to-the-raspberry-pi-5)Stackexchange community

If anything is off, please write me at sophia DO.T wagner A.T ois42.de
I wish you all a chilled day! Stay safe :)

picamera
No comment yet.
Scooped by F. Thunus
Scoop.it!

Using a Raspberry Pi Pico to make a Keyboard & Gamepad – HackSpace Magazine Issue 78 @HackSpaceMag « Adafruit Industries – Makers, hackers, artists, designers and engineers!

HackSpace Magazine Issue 78 features building of a custom game controller using an RP2040 microcontroller programmed in CircuitPython: There’s a sizeable community of DIY keyboard makers who have c…...
No comment yet.
Scooped by F. Thunus
Scoop.it!

Rotary Phone Lives On As Arduino Kitchen Timer

Rotary Phone Lives On As Arduino Kitchen Timer | Raspberry Pi | Scoop.it
It's safe to say that few people still use rotary phones on a daily basis. Hell, most of us don't even use landline telephones anymore. But just because these classic phones are no longer being used f...
No comment yet.
Scooped by F. Thunus
Scoop.it!

Introduction to Arduino UNO R4 WiFi | Starter Kit

Arduino Starter Kit: https://geni.us/ArduinoStarter (affiliate link)
A kit to take the first steps into the world of electronics with this Arduino UNO R4 WiFi Starter Kit.

https://cdkeysales.com/ 25% Cupom: RJT25
Win11 PRO key(€22): https://pt.cdkeysales.com/cs/RJT25-11P
Win10 PRO key(€16): https://pt.cdkeysales.com/cs/RJT25-10P
Win10 Home(€13): https://pt.cdkeysales.com/cs/RJT25-10H
Win11 Home(€21): https://pt.cdkeysales.com/cs/RJT25-11H
Office19 PRO key(€44): https://pt.cdkeysales.com/cs/RJT25-O19
Win10 PRO+Office19 PRO keys pack(€55): https://pt.cdkeysales.com/cs/RJT25-10P19

✅ SCREEN RECORDING SOFTWARE: ✅
Screen Studio: https://shorturl.at/RSZ15
FocuSee: https://shorturl.at/uCFGL
OBS: https://shorturl.at/npES2

✅ RECORDING GEAR: ✅

🅿️ Sony ZVE-10: https://geni.us/SonyZVE10s
🅿️ Sigma 16mm F1.4: https://geni.us/Sigma16m
🅿️ Canon M50: https://geni.us/CanonM50ss
🅿️ Canon M200: https://geni.us/CanonM200
🅿️ Canon M100: https://geni.us/CanonM100s
🅿️ Canon 22mm 2.0: https://geni.us/Canon22m
🅿️ Go Pro 9: https://geni.us/Gopro9s
🅿️ Canon 650D: http://geni.us/Canon650D
🅿️ 50mm Lens: http://geni.us/Canon50mm18
🅿️ 24mm Lens: http://geni.us/Canon24mm28
🅿️ Drone: http://geni.us/DJIPhantom3S
🅿️ Office Lights: http://geni.us/Aputure672W

** As an Amazon Associate I earn from qualifying purchases.

#arduino #starterkit #eletronics
No comment yet.
Scooped by F. Thunus
Scoop.it!

Installing Syncthing on a Headless Raspberry Pi

Links to commands and written instructions: https://soup-hacker.github.io/quartz-notes/everything/homelab/headless-syncthing

First video, go easy on me :)
No comment yet.
Scooped by F. Thunus
Scoop.it!

DIY Raspberry Pi Photo Booth Build

Professional looking Photo Booth built right at home with a Raspberry Pi 3B.
Prints to a portable Canon Selphy 1300 printer
Uploads photos automatically to a Dropbox account
Download photos via a QR code to your phone.
Very customisable!!!

Uses opensource software called Pibooth.

00:00 - Intro
00:24 - Parts I Used
09:19 - Software Install
23:48 - Optional Plugin Install
30:04 - Software Configuration
48:08 - Hardware Setup
1:03:44 - Putting it all Together
1:11:11 - The Final Product

****Pibooth Links here:
Documentation: https://documentation.pibooth.org/en/stable/
Github: https://github.com/pibooth/pibooth

****Plugins I used:
- Picture Template: https://pypi.org/project/pibooth-picture-template/
- Sound Effects: https://pypi.org/project/pibooth-sound-effects/
- Dropbox: https://pypi.org/project/pibooth-dropbox/
- QR Code: https://pypi.org/project/pibooth-qrcode/
- NeoPixel Ring: https://github.com/peteoheat/pibooth-neopixel_spi

****Link to download my NeoPixel Ring Diffuser STL Files:
https://www.thingiverse.com/thing:6639834

****Commands I ran:
- sudo apt-get update
- sudo apt-get full-upgrade
- sudo apt-get install libsdl2-*
- sudo apt-get install cups libcups2-dev
- sudo usermod -a -G lpadmin pibooth
- sudo pip3 install pibooth[printer]
- sudo apt-get install python3-opencv
- sudo nano /boot/config.txt
Add the following at the bottom of the file:
dtoverlay=gpio-shutdown
Save file

To remotely edit cups config run:
- sudo nano /etc/cups/cupsd.conf
Put a hash in front of "Listen localhost:631"
Add a new line "Port 631"
Add "Allow @local" Under the following headings:
"# Restrict access to the server..."
"# Restrict access to the admin pages..."
"# Restrict access to configuration files..."
Save file
-Run "/etc/init.d/cups restart" to apply changes or wait until the next restart

To enable Camera:
- sudo raspi-config
Go to interface options then Legacy camera and enable
Reboot

After enabling camera I lost my 1024 x 600 resolution. To fix:
- sudo nano /boot/config.txt
Add the following at the bottom of the file:
hdmi_cvt=1024 600 60 3 0 0 0
Save file
Reboot
Change resolution for both display and headless in display settings:
Display need to be at 1024x600
Headless at 1280x1024
Reboot

Update GPU memory:
- sudo raspi-config
Select Performance Options
Select GPU Memory
Change to 192
Save changes
Reboot

Default plugin Install:
- pip install pibooth-picture-template
- pip install pibooth-sound-effects
- pip install pibooth-dropbox
- pip install pibooth-qrcode

NeoPixel Ring Plugin Config file:
Change "num_pixels =" to 16
Change "time_between_pixels = raw_time_between_pixels" from 1.75 to 1
Save file
-sudo pip3 install adafruit-circuitpython-neopixel-spi
Edit pibooth.config file
Find the line "# Path to custom plugin(s) not installed with pip (list of quoted paths accepted)"
Add "plugins = CustomPlugins/pibooth_neopixel_spi.py"
Save file

Additional config changed in "pibooth.config" file
footer_text2 = "{date.day}/{date.month}/{date.year}"
resolution = (3280, 2464)
debounce_delay = 0.1
template = picture-template2.xml
Under "[QRCODE]" heading:
prefix_url = {url}
No comment yet.
Scooped by F. Thunus
Scoop.it!

Level Up with Arduino UNO R4 WiFi: Features, Pinouts, and Programming [IoT Development Crash Course]

Welcome to the first lesson of the Arduino Uno R4 WiFi - IoT Development Crash Course!

In this video, host Joed Goh dives deep into your toolbox for building amazing projects. You'll get to know all the essential components like sensors, displays, IoT modules, and actuators that you'll be using throughout the course.

Joed also breaks down the exciting features of the new Arduino Uno R4 WiFi, highlighting the differences from both the classic Uno Rev3 and the streamlined Uno R4 Minima.

But that's not all! We'll also guide you through installing and setting up the Arduino IDE, your programming hub for bringing your ideas to life. Finally, get ready to upload your first program! Joed demonstrates how to upload a sample LED Matrix animation sketch to the Arduino Uno R4 Minima, giving you a taste of the cool things you can create.

----------------------------------------------------------------------------------------------------------------
Where to buy?
52Pi official website link:https://52pi.com/collections/new-arrivals/products/cloud-ready-starter-kit-for-arduino-uno-r4-wifi


Amazon link:
https://amzn.to/3Kb0qzZ
https://www.amazon.co.uk/dp/B0D1CD2CBD
https://www.amazon.de/dp/B0D1CD2CBD
https://www.amazon.fr/dp/B0D1CD2CBD
https://www.amazon.it/dp/B0D1CD2CBD
https://www.amazon.es/dp/B0D1CD2CBD

------------------------------------------------------------------------------------------------------------------
TABLE OF CONTENTS
00:00 Introduction
02:00 Unboxing
03:30 Quick inspection of each component
09:43 TF Card Content
09:52 Features and Pinouts: Uno R3 vs R4 Minima vs R4 WiFi
15:55 Arduino IDE
17:31 Uploading LED Matrix Animation Sketch

------------------------------------------------------------------------------------------------------------------

PLAYLISTS:
Level Up with Arduino UNO R4 WiFi - IoT Development Crash Course
https://www.youtube.com/playlist?list=PLVTsfY7Kr9qjOA9hcP5FNqH9A5RGN2PDH

Arduino UNO R4 Minima Ultimate Training Course
https://www.youtube.com/playlist?list=PLVTsfY7Kr9qhzrfkvEuI1JhbqoOuchmKw

SunFounder Kit Product Review
https://www.youtube.com/playlist?list=PLVTsfY7Kr9qj3mVZgvStfVjFuecVrUim0

Designing Database Solutions with Microsoft SQL Server 2019
https://youtube.com/playlist?list=PLVTsfY7Kr9qjagmWoPLXPvdOk46C5IAB_

Artificial Intelligence and Machine Learning Foundations
https://youtube.com/playlist?list=PLVTsfY7Kr9qjMqXcOUEkB_rDHQVTVDYtY

IoT Development
https://www.youtube.com/playlist?list=PLVTsfY7Kr9qjVkq8aJmTXbiiy5h41ayRL

Android App Development in Kotlin
https://youtube.com/playlist?list=PLVTsfY7Kr9qimoaNmBCQQcvNi49EoKTWS

Embedded Systems using Arduino Uno
https://youtube.com/playlist?list=PLVTsfY7Kr9qhkfmq85MH2xObFIELuq_Vo

Data Structures and Algorithms using C#
https://youtube.com/playlist?list=PLVTsfY7Kr9qiTxECmzTVkLZt1DkaFEfUg

#arduino #52pi #iotdevelopment #arduinouno #arduinosoftware
No comment yet.
Scooped by F. Thunus
Scoop.it!

Modos Paper Monitor is an open hardware 13.3 inch E Ink monitor (crowdfunding)

Modos Paper Monitor is an open hardware 13.3 inch E Ink monitor (crowdfunding) | Raspberry Pi | Scoop.it
Modos Paper Monitor is an open hardware 13.3 inch E Ink monitor (crowdfunding)...
No comment yet.
Scooped by F. Thunus
Scoop.it!

How to Use I2C LCD with Arduino || LCD Displays with Arduino || i2c LCD Display

How to Use I2C LCD with Arduino || LCD Displays with Arduino || i2c LCD Display #i2c #i2clcd #arduino


------------------------------------------------------------------
------------------------------------------------------------------
--------------------------------

Instagram: https://www.instagram.com/mytechlearner/
Facebook: https://www.facebook.com/profile.php?id=100012664446627&mibextid=ZbWKwL

Keywords:
arduino lcd i2c, arduino i2c, arduino i2c lcd, i2c lcd display, i2c arduino, i2c lcd, i2c lcd arduino code, i2c lcd arduino uno, i2c lcd arduino minima, i2c lcd arduino r4, i2c lcd arduino connection, i2c lcd arduino, how to use i2c lcd arduino, how to find i2c address arduino, i2c lcd display tutorial, lcd i2c arduino uno, arduino i2c lcd display tutorial, lcd i2c arduino mega, lcd i2c is not showing text, i2c lcd arduino mega, lcd i2c arduino library, i2c library

I appreciate if you *SUBSCRIBE and *SHARE my content.
Don't forget to click 🔔icon.
------------------------------------------------------------------
------------------------------------------------------------------
----------------------------------------

#i2clcd #lcdi2c #arduinoi2clcd #arduinolcdi2c #i2clcdwitharduino
#i2c #i2clcdarduinocode #i2clcdarduinoconnection #arduino
#arduinoi2clibrary #arduinoi2clcddisplay #arduinoi2ctutorial
#i2clcdarduino20x4 #i2clcdarduino16x2 #lcdi2carduinocode
No comment yet.
Scooped by F. Thunus
Scoop.it!

install home assistant to raspberry pi KinCony Server16 beginner guide

install home assistant to raspberry pi (KinCony Server16) beginner guide

how to install home assistant for Server-16 beginner guide 1. make home assistant SD card for KinCony Server-16. download:https://www.raspberrypi.com/software/

enable i2c for home assistant. Add files to enable I2C
In the root of the hassos-boot partition, add a new folder called CONFIG.
In the CONFIG folder, add another new folder called modules.
Inside the modules folder add a text file called rpi-i2c.conf with the following content: i2c-dev
In the root of the hassos-boot partition, edit the file called config.txt add two lines to it: dtparam=i2c_vc=on
dtparam=i2c_arm=on

3.3. install HACS addon (use by SSH)
https://hacs.xyz/docs/setup/download/
4.MCP23008/MCP23017 implementation for Home Assistant (HA)
https://github.com/jpcornil-git/HA-mcp23017
5. config ymal for MCP23017
install file edit add-on for HA , then config yaml
https://www.kincony.com/forum/showthread.php?tid=5438
forum link: https://www.kincony.com/forum/showthread.php?tid=5727
No comment yet.
Scooped by F. Thunus
Scoop.it!

Smart Home Security: Arduino Dog Bark Alarm

Welcome to my latest DIY project video! In this tutorial, I'll show you how to create a smart home security system using an Arduino and a sensor that triggers a dog barking sound. This simple yet effective project can help deter intruders and add an extra layer of protection to your home.
/
What You'll Learn:
How to set up and program an Arduino for this security project.
How to connect and use sensors to detect motion or other triggers.
How to add sound output to your Arduino project to simulate a barking dog.
Tips and tricks for enhancing your home security with DIY electronics.
Components Needed:
Arduino board (e.g., Arduino Uno)
PIR motion sensor or other suitable sensors
Speaker or buzzer
Breadboard and jumper wires
Code (provided in the video and description)
Why This Project?
Using a dog bark alarm is a clever way to deter potential intruders. Many burglars are discouraged by the presence of a dog, and this project mimics that effect with technology. It's an affordable and customizable solution for enhancing your home security.

Watch the Video:
Be sure to watch the full video for step-by-step instructions, and don't forget to like, comment, and subscribe for more awesome DIY projects!

Resources:
web: buxin.gm
Components: https://www.amazon.com/shop/madeinthegambia?ref_=cm_sw_r_cp_ud_aipsfshop_aipsfmadeinthegambia_817VBQBR0QKTWXCSBXRE

Follow Me:
Instagram: https://www.instagram.com/buxing_brix/
Tiktok : https://www.tiktok.com/@buxin_electronics
Facebook: //www.facebook.com/tectbuxingcreaton/
No comment yet.
Scooped by F. Thunus
Scoop.it!

I built a robot with Raspberry Pi and Arduino. Your questions answered!

Building this project has been an interesting journey. In this video I answer some of your questions and talk about the latest progress on the build.

Join the Maker Forge community
https://bit.ly/makerforge-community

Read more about this and other projects
https://www.makerforge.tech/

Duckling Droids Facebook group
https://m.facebook.com/groups/1330064834544532/

Take a look at the playlist below for previous videos in this series.
https://www.youtube.com/playlist?list=PL_ua9QbuRTv6Kh8hiEXXVqywS8pklZraT

Music:
https://www.makerforge.tech/about/#music-and-sounds
No comment yet.
Scooped by F. Thunus
Scoop.it!

PiPhi Network - Adding the Adafruit AHT20 Sensor on a Raspberry Pi 4

Firstly congrats to PiPhi Network on a successful Mainnet launch.

I already have some existing sensors such as Awair Element and Atmotube Pros connected, but I now want to delve into adding mini temperature sensors to my devices such as the Adafruit series. In this video, I will demonstrate how to add the Adafruit AHT20 Temperature and Humidity sensor to a Raspberry Pi 4.

In this video we will cover the following topics:

1) The AHT20 Sensor pin-outs to the Raspberry Pi 4
2) AHT20 Driver installation
3) Testing the AHT20 board using Python
4) Adding the Sensor to PiPhi
5) Testing the PiPhi dashboard to ensure data is being submitted.

Items used in this video and useful links:

PiPhi License purchase:

◉ PiPhi Mocha Software License: https://piphi.network/?ref=sqYF1JlNg4eSXw - Then click on the Downloads menu and scroll down until you see Products - PiPhi Mocha and Click "Add To Cart"

◉ Use the following code for 10% discount on PiPhi shop orders: HandyMan10

Hardware Components (this video)

Raspberry Pi 4
◉ Raspberry Pi 4: https://amzn.to/43xzMuj

AdaFruit AHT20 Sensor
https://amzn.to/3X1E77M

JST 4-pin cable
https://amzn.to/3V0PTwz

Pin-out diagram: https://learn.adafruit.com/adafruit-aht20/python-circuitpython

Driver installation: sudo pip3 install adafruit-circuitpython-ahtx0
Driver test code for sensor: https://learn.adafruit.com/elements/3064505/download?type=zip

Other Sensors
◉ Sensedge Mini (Kaiterra): https://amzn.to/3rlmtOc
◉ Awair Element: https://amzn.to/3NxFWTs

PC
◉ Bkouen Mini PC Windows 11 Intel N5105 8GB 256GB: https://amzn.to/3rc8gDw

G-Mouse
◉ USB G-Mouse: https://amzn.to/44bwlsv or https://amzn.to/46CEw2W

◉PiPhi Discord link: https://discord.gg/kRjpDc5W
◉PiPhi Website: https://piphi.network/
◉PiPhi Software Downloads: https://piphi.network/#downloads

◉ Video - PiPhi Raspberry Pi setup + Wallet Setup information: https://www.youtube.com/watch?v=oXuPCAffkgY&t=334s
◉Video - PiPhi Windows setup: https://www.youtube.com/watch?v=3N1pBnhIDmA

If you have any other questions/suggestions on any part of the PiPhi setup, please feel free to ask in the comments section.

Please like, subscribe, share and hit that Bell notification to be informed when a new video drops.

Please support the channel and get yourself some Savage Attire merch here:
https://handyman-savage-attire.creator-spring.com

Thanks for watching and I will see you Savages on the next one.
No comment yet.
Scooped by F. Thunus
Scoop.it!

NEW GUIDE: Adafruit USB Host BFF #AdafruitLearningSystem #Adafruit @adafruit « Adafruit Industries – Makers, hackers, artists, designers and engineers!

NEW GUIDE: Adafruit USB Host BFF #AdafruitLearningSystem #Adafruit @adafruit « Adafruit Industries – Makers, hackers, artists, designers and engineers! | Raspberry Pi | Scoop.it
The Adafruit USB Host BFF makes it easy to add USB Host support to your QT Py board, especially now that TinyUSB supports it in the Arduino library as a ‘native’ interface for host supp…...
No comment yet.
Scooped by F. Thunus
Scoop.it!

HealthyPi Move is an open-source nRF5340-powered biometric monitor worn like a watch (Crowdfunding) - CNX Software

HealthyPi Move is an open-source nRF5340-powered biometric monitor worn like a watch (Crowdfunding) - CNX Software | Raspberry Pi | Scoop.it
The HealthyPi Move is the latest biometric monitor in the HealthyPi series from ProtoCentral.It is the first to come in a wearable form factor and can...
No comment yet.
Scooped by F. Thunus
Scoop.it!

LattePanda Mu Review: Faster than Raspberry Pi 5, But Much More Expensive

LattePanda Mu Review: Faster than Raspberry Pi 5, But Much More Expensive | Raspberry Pi | Scoop.it
The new LattePanda Mu is powered by an Alder Lake N100 CPU and its claims of being twice as powerful as a Raspberry Pi 5 are not without merit.
No comment yet.
Scooped by F. Thunus
Scoop.it!

How to Setup a Raspberry Pi Static IP Address

How to Setup a Raspberry Pi Static IP Address | Raspberry Pi | Scoop.it
In this tutorial, we will show you how to configure your Raspberry Pi so that it utilizes a static IP address.
No comment yet.
Scooped by F. Thunus
Scoop.it!

Leaf color detection with Arduino | Science Project

Parts list, circuit diagram, and example code for this science project are available on our website: https://www.sciencebuddies.org/science-fair-projects/project-ideas/Elec_p110/electricity-electronics/leaf-color-detection

Color sensor tutorial: https://youtu.be/oPFQrKC0nSg?si=3kpcfVHzt74oULem

Robotic arm project: https://www.sciencebuddies.org/science-fair-projects/project-ideas/Robotics_p050/robotics/arduino-robotic-arm

Autonomous car project: https://www.sciencebuddies.org/science-fair-projects/project-ideas/Robotics_p042/robotics/arduino-self-driving-car

Science Buddies also hosts a library of instructions for over 1,500 other hands-on science projects, lesson plans, and fun activities for K-12 parents, students, and teachers! Visit us at http://www.sciencebuddies.org to learn more.

#STEM #sciencebuddies
*******************************
Connect with Science Buddies:

X: https://x.com/ScienceBuddies

FACEBOOK: https://www.facebook.com/ScienceBuddies

INSTAGRAM: https://www.instagram.com/scibuddy

PINTEREST: https://www.pinterest.com/sciencebuddies
No comment yet.
Scooped by F. Thunus
Scoop.it!

The Adafruit MintyBoost Kit V3.0 – HackSpace Magazine Issue 78 @HackSpaceMag « Adafruit Industries – Makers, hackers, artists, designers and engineers!

The Adafruit MintyBoost Kit V3.0 – HackSpace Magazine Issue 78 @HackSpaceMag « Adafruit Industries – Makers, hackers, artists, designers and engineers! | Raspberry Pi | Scoop.it
HackSpace Magazine Issue 78 – The Future of Making features the Adafruit MintyBoost Kit V3.0: The MintyBoost from Adafruit is a must-have kit for anyone  getting started with soldering.I have boug…...
No comment yet.
Scooped by F. Thunus
Scoop.it!

Electronic video || Motor wiring diagram || #viral #electrician #electronic #shortvideo

Electronic video || Motor wiring diagram || #viral #electrician #electronic #shortvideo
#electronic #music #electronicmusic #techno #electronics #technology #dj #house #tech #dance #edm #producer #electronica #electro #electrical #s #housemusic #newmusic #arduino #deephouse #instagood #synth #gadgets #device #gadget #engineering #rave #ambient #instatech #dancemusic


#shorts #short #shortvideo #shortsvideo #shortsfeed #status #ytshorts #ytshort #yt #ytshortsindia #ytshortsvideo #youtubeshorts #youtubeshort #life #lifehacks #lifestyle #craft #crazy #crazyxyz #craftideas #hacker #hackerfreefire #experiment #experiments #a2motivation #viral #viralshorts #viralshort #viralvideo #viralvideos #trending #trendingshorts #trendingvideo #trendingstatus #emotional #emotionalshorts #dailyvlog #dailyshorts #daily #lifehacks #india #itzy #facts #fact #factvideo #motivation #motivational #motivationshorts #amazing #amazingfacts #amazingshorts #sauravjoshivlogs #piyushjoshivlogs #technology #technogamerz #usefullifehacks #crafting #experiment #experimentshorts #facts #factshorts #factvideo #animalshorts #dogshorts #funnyshorts #comedyshorts
No comment yet.
Scooped by F. Thunus
Scoop.it!

Automatic Plant Watering System using Arduino Tinkercad in English | Block Coding |Irrigation System

Automatic Plant Watering System using Arduino Tinkercad in English | Block Coding | Irrigation System | Arduino Project | Tinkercad Project | Smart Irrigation System

Project Code -
https://drive.google.com/file/d/1vSr30rwcfbMkRi3Qr1P21crUg42Cg9cu/view?usp=share_link

Learn Robotic Class contact me on Whatsapp +917007651787
Book your Trail Class

Tinkercad is a free online web browser & Simple to simulate the electronic project

Electrical & Electronic project Visit our website
https://eazytronic.com/

Tinkercad Website Link :- https://www.tinkercad.com/

#1 Getting Started With Tinkercad in English || This Tutorial for Complete Beginners
https://www.youtube.com/watch?v=K_2k2nKttMM&t=32s

Getting started with Tinkercad In Hindi
https://www.youtube.com/watch?v=eNdmu0VTPQU&list=PL4an6ELdlijducM1Y3oltzyFagC6Hx23Z

Arduino Tutorial at Tinkercad in Hindi / English


Our motive is to teach robotics to the students. if you have any doubt you can ask from the comment section.

#arduino # ultrasonic #tinkercad
No comment yet.
Scooped by F. Thunus
Scoop.it!

Control DC Motor Speed with Arduino and L298N Driver - Easy Tutorial

Learn how to use L298N Driver with Arduino [Step-by-Step Guide] [2024] - PART 8

How to control DC Motor Speed with Arduino Using L298N DC Motor Driver

Arduino code:

Question to the viewers:

ABOUT:Embark on a comprehensive journey into the world of motor control with our step-by-step tutorial on using the L298N driver with Arduino. In this detailed guide, we break down each stage of the process, from wiring connections to code implementation, ensuring that even beginners can follow along with ease. Join us as we explore the capabilities of the L298N driver and its seamless integration with Arduino, laying the foundation for your future projects. Whether you're a novice enthusiast or an experienced maker, this video provides invaluable insights and practical tips to elevate your skills and expand your understanding of motor control concepts. Get ready to dive into the exciting world of robotics, automation, and more in this engaging tutorial series.


#l298n #dcmotordriver #arduino
No comment yet.
Scooped by F. Thunus
Scoop.it!

Mobile Mojo Mastery using Wireless Desktop CNC - Make:

Mobile Mojo Mastery using Wireless Desktop CNC - Make: | Raspberry Pi | Scoop.it
The realm of desktop CNC machining is undergoing a creative explosion.What once felt like a niche hobby for techie types is now a super-powered tool for...
No comment yet.
Scooped by F. Thunus
Scoop.it!

LiFi project using arduino! Easy Project #experiment #arduinonano

Ever wanted to control LEDs with a joystick? This short shows a cool trick from our full tutorial! ➡️ https://youtu.be/DsQ5K_uGpFg?si=fVjOe_0Mi6B-0HU3

Full tutorial includes:

Everything you need to get started!
Building the circuit step-by-step ️
Programming the joystick for LED control
#joystick #led #diy #electronics #project #tutorial #shorts
No comment yet.